Discover 10 expert window box design tips to transform your home’s exterior. Learn how to combine colors, textures, and plant varieties for eye-catching displays year-round.
Introduction:
Hey there, fellow garden enthusiasts! Did you know that well-designed window boxes can boost your home’s value by up to 5%? That’s right – these little gardens pack a serious punch when it comes to curb appeal. I’ve been obsessed with window boxes ever since I moved into my first apartment and desperately needed some greenery in my life. Trust me, I’ve made every mistake in the book (like that time I overloaded my window box and nearly took out a pedestrian below – oops!). But after years of trial and error, I’ve learned a thing or two about creating eye-catching displays that’ll make your neighbors green with envy.
In this article, I’m going to spill all my secrets for transforming your home’s exterior with some seriously stunning window boxes. We’ll cover everything from color combos that pop to clever design tricks that’ll have people stopping in their tracks. So grab a cup of coffee (or a watering can), and let’s dive into the wonderful world of window box design!
Table of Contents
1.Choose the Right Size and Style
Alright, let’s kick things off with the basics – size and style. I can’t tell you how many times I’ve seen window boxes that look like they’re about to swallow the entire house! Here’s the deal: your window box should be your window’s best friend, not its overbearing cousin.
First up, consider the proportions of your windows. A good rule of thumb is to make your box about 1 inch narrower than the overall width of your window. Trust me, this little detail makes a huge difference in the overall look.
Next, let’s talk style. Your window box should be like the perfect accessory – it should complement your home’s architecture, not clash with it. If you’ve got a cute cottage-style home, go for something with a bit of whimsy. For you modern minimalists out there, sleek lines and neutral colors are your best bet.
Oh, and don’t forget about drainage! I learned this the hard way when my first window box turned into a swamp and killed all my plants. Make sure your box has proper drainage holes, and consider adding a layer of gravel at the bottom for extra measure.
2.Play with Color Combinations

Now, this is where the fun really begins! Playing with colors in your window box is like being an artist, but instead of a canvas, you’ve got soil and instead of paint, you’ve got flowers. How cool is that?
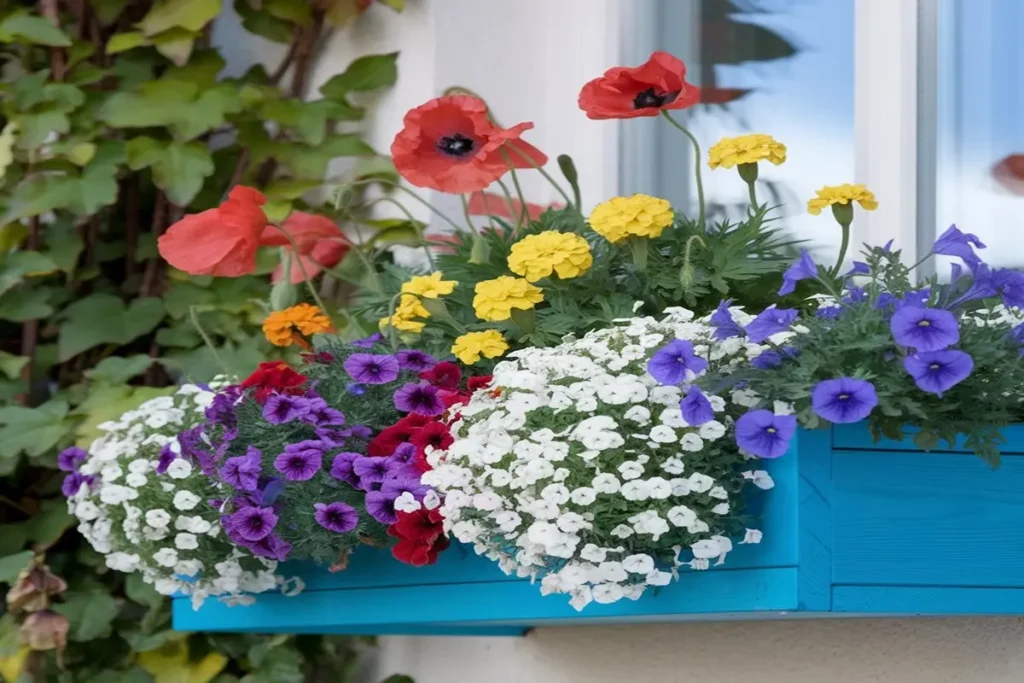
First things first, let’s talk about the color wheel. Remember that thing from art class? It’s about to become your new best friend. Complementary colors (those opposite each other on the wheel) create a bold, eye-catching look. Think purple petunias with yellow marigolds – BAM! Instant curb appeal.
But here’s a pro tip: don’t forget about your home’s exterior color. You want your window box to pop, not look like it’s at war with your siding. If you’ve got a blue house, try whites and yellows for a fresh, crisp look.
And if you’re feeling a bit overwhelmed by all the color options, here’s a little secret: you can never go wrong with a monochromatic scheme. Pick your favorite color and use different shades of it. I once did an all-pink window box, and let me tell you, it was like a little slice of Barbie’s dreamhouse right outside my window!
3.Mix and Match Textures
Okay, confession time. I used to think texture was just for interior designers and fancy chefs. But boy, was I wrong! Mixing textures in your window box is like adding the secret ingredient to your grandma’s famous recipe – it just takes everything to the next level.
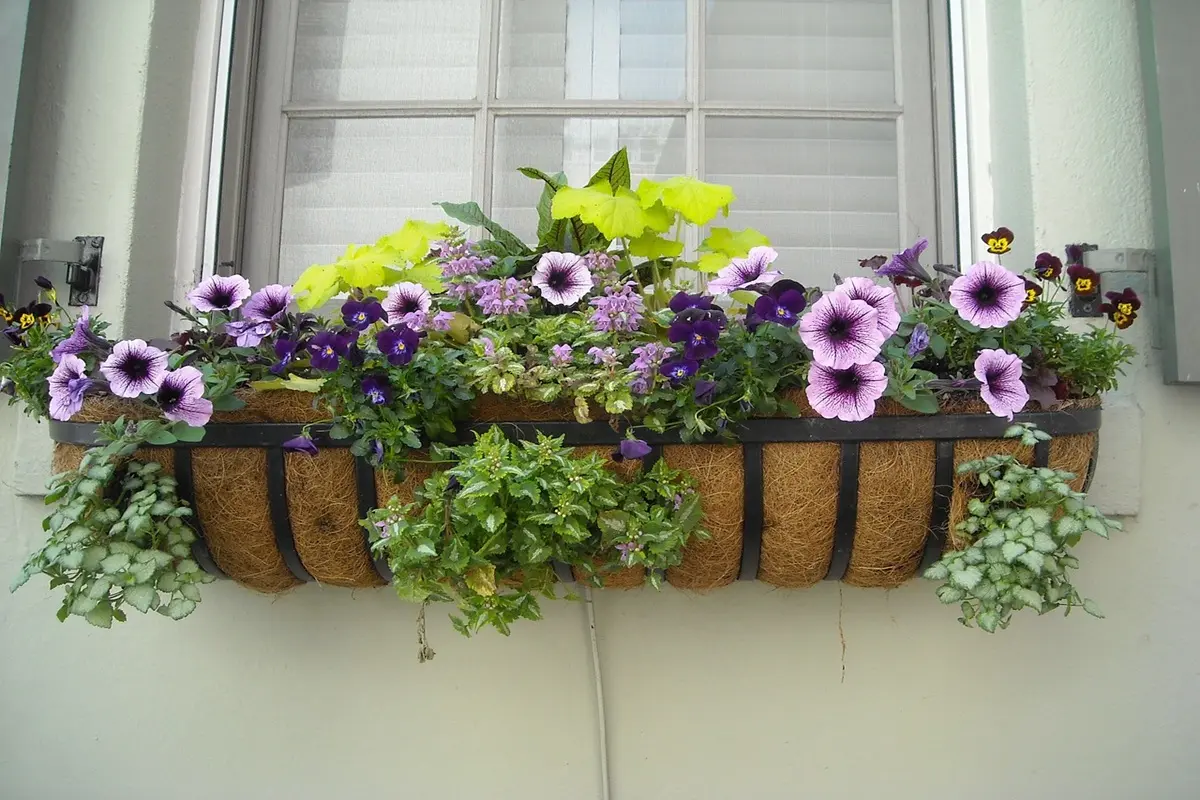
Start by combining plants with different leaf shapes and sizes. Think big, bold hostas next to delicate ferns. It’s like the plant version of “The Odd Couple,” but trust me, it works!
Now, let’s talk about trailing plants. These are the unsung heroes of window box design. They soften the edges of your box and create this gorgeous, cascading effect. I’m a big fan of ivy or sweet potato vine for this.
And here’s a little trick I picked up: don’t be afraid to add non-plant elements for texture. Small branches, decorative stones, or even a tiny garden gnome (if that’s your thing) can add interesting visual elements and really make your window box stand out.
4.Follow the “Thriller, Filler, Spiller” Rule

Alright, buckle up because I’m about to drop some serious window box wisdom on you. Have you ever heard of the “Thriller, Filler, Spiller” rule? No? Well, get ready to have your mind blown!
This classic design principle is like the holy trinity of window box arrangement. Here’s how it works:
- Thriller: This is your star player, the plant that’s going to grab everyone’s attention. Usually, it’s the tallest plant in the center of your box. Think ornamental grasses, canna lilies, or even a small shrub.
- Filler: These are the team players that support your thriller. They fill in the gaps and create a lush, full look. Geraniums, petunias, or impatiens are great fillers.
- Spiller: Last but not least, these are your trailing plants that spill over the edges of the box. They soften the look and add that wow factor. Try some ivy, sweet potato vine, or trailing lobelia.
When I first learned this trick, it was like someone had handed me the cheat codes to window box design. Suddenly, all my arrangements started looking more professional and put-together.
Here’s how I like to arrange them: put your thriller in the center or at regular intervals if you have a long box. Then, surround it with your fillers, making sure to vary the heights a bit. Finally, pop your spillers near the edges where they can do their thing.
5.Consider Seasonal Interest
Let’s face it, nobody wants a window box that looks amazing for two weeks and then turns into a sad, wilted mess for the rest of the year. That’s why planning for year-round appeal is crucial.
First up, consider incorporating some evergreens. These are your reliable friends that’ll keep your window box looking good even when everything else has gone dormant. I’m a big fan of small conifers or boxwood for this.
But here’s where it gets fun – seasonal rotations! Think of your window box as a stage, and you’re the director changing the set for each season. In spring, I love to use tulips and daffodils for a cheerful burst of color. Summer is all about those heat-loving annuals like petunias and marigolds.
When fall rolls around, don’t be afraid to get creative. I once used small pumpkins and gourds mixed with chrysanthemums, and it looked like autumn had exploded in my window box (in a good way!).
And winter? Oh, winter is my secret favorite. Try some red twig dogwood branches, pine cones, and maybe even some outdoor-safe ornaments for a festive touch.
Remember, the key is to plan ahead. I like to sketch out my ideas for each season so I’m not scrambling at the last minute. Trust me, your future self will thank you!
6.Create Depth with Layering
Alright, let’s talk about layering – and no, I don’t mean your winter wardrobe! Creating depth in your window box is like adding dimension to a painting. It turns a flat, boring display into something that really catches the eye.
The key here is to think front-to-back, not just side-to-side. I learned this the hard way when all my first window boxes looked great from the street but were practically empty when viewed from inside the house. Rookie mistake!
Start by placing taller plants at the back of the box. These could be your ‘thrillers’ we talked about earlier. Then, gradually work your way forward with medium-height plants, and finally, low-growing or trailing plants at the front.
Here’s a pro tip: don’t be afraid to stack things up a bit. I sometimes use small, invisible plastic pots inside my window box to elevate certain plants. It’s like giving some of your plants a little booster seat!
And remember, a lush, full appearance is the goal here. Don’t be shy about really packing those plants in. Just make sure they all have similar light and water needs, or you might end up with some very unhappy plant neighbors!
7.Add Unexpected Elements
Now, this is where you can really let your personality shine through! Adding unexpected elements to your window box is like accessorizing an outfit – it’s that final touch that makes everything pop.
I remember the first time I added a tiny garden gnome to my window box. My neighbors thought I’d lost it, but you know what? That little guy became a conversation starter and before I knew it, the whole street was trying to outdo each other with quirky window box additions!
But it doesn’t have to be gnomes (unless you want it to be). Think about incorporating small sculptures, decorative stones, or even weather-resistant mirrors to reflect light and add depth. I once saw a window box with a miniature fairy garden inside, complete with tiny furniture. It was absolutely magical!
Don’t be afraid to get creative with your container either. Old wooden crates, vintage suitcases, or even repurposed gutters can make for unique and eye-catching window boxes. Just make sure whatever you use has proper drainage!
And let’s not forget about lighting. A few well-placed solar-powered fairy lights can turn your window box into a magical display as the sun goes down. Trust me, it’s worth the extra effort when you’re enjoying your illuminated masterpiece on a warm summer evening!
8.Design for Your Home’s Style
Here’s something I learned the hard way: a window box that looks amazing on Pinterest might look completely out of place on your actual house. The key is to design your window box to complement your home’s style, not fight against it.
For all you cottage-core enthusiasts out there, embrace that charming, slightly overgrown look. Mix in lots of colorful blooms with some trailing ivy. Bonus points if you can incorporate some edible herbs or flowers!
If you’re more of a modern minimalist, don’t worry – window boxes aren’t just for the cottage crowd. Try sleek, geometric containers filled with structural plants like succulents or ornamental grasses. Stick to a monochromatic color scheme for that clean, contemporary vibe.
And for those of you with classic, traditional homes, you can’t go wrong with a mix of timeless flowers like geraniums, petunias, and impatiens. A white window box filled with red geraniums? That’s a classic for a reason, folks!
Remember, the goal is for your window box to look like it was always meant to be there, not like it was plopped on as an afterthought. Take cues from your home’s architecture, color, and overall vibe, and you can’t go wrong.
9.Consider Viewing Angles
Okay, here’s something that took me way too long to figure out: your window box isn’t just for the neighbors to admire – you should be able to enjoy it from inside your house too!
When you’re planning your design, think about how it’ll look from the street, sure, but don’t forget to consider the view from your window. I once created what I thought was a stunning arrangement, only to realize all I could see from inside was a bunch of green leaves pressed against the glass. Not exactly the view I was going for!
Here’s a trick I use now: I arrange my plants in the box while it’s on the ground, then I kneel down to see how it looks from below. This gives me a good idea of what the view will be like from inside the house.
And hey, if privacy is a concern, you can use your window box to your advantage. Taller plants or grasses strategically placed can provide a bit of a natural screen without making your room feel like a cave.
Just remember, balance is key. You want your window box to look good from all angles, not just one perfect spot on the sidewalk!
10.Maintain Proportion and Balance
Last but definitely not least, let’s talk about proportion and balance. This is the secret sauce that takes your window box from “Oh, that’s nice” to “Wow, how did they do that?!”
First things first: spacing. When you’re first planting your window box, it might look a little sparse. But trust me, those plants are going to grow! Give them some room to spread out. I usually follow the spacing guidelines on the plant tags, but I’ll admit, sometimes I cheat a little and plant them slightly closer for a fuller look right off the bat.
Now, let’s talk symmetry. A symmetrical design can look really polished and put-together. But don’t be afraid to play with asymmetry too! An off-center focal point can add some really interesting visual appeal.
And here’s my number one tip for maintaining balance: vary your plant heights. If everything’s the same height, your window box is going to look as exciting as a bowl of oatmeal (no offense to oatmeal lovers out there). Mix it up with some tall, medium, and low-growing plants to create that lush, professional look.
Conclusion:
Whew! We’ve covered a lot of ground, haven’t we? From color combos to quirky accessories, these window box design tips are your ticket to next-level curb appeal. But here’s the thing: while these guidelines are great starting points, the real magic happens when you let your personality shine through.
Remember, your window box is like a little snapshot of you, hanging right there on your house for all to see. So don’t be afraid to experiment, to try new things, and yes, even to make mistakes. (Trust me, if my window boxes could talk, they’d have some pretty embarrassing stories to tell!)
The impact of a well-designed window box goes beyond just making your house look pretty. It’s about creating a welcoming atmosphere, adding a pop of nature to urban spaces, and quite frankly, giving yourself a little mood boost every time you see it.
So go on, get out there and give these tips a try! Play with colors, experiment with textures, and for goodness’ sake, don’t forget to have fun with it. Your perfect window box design is out there waiting for you to create it.
And hey, I’d love to hear how it goes! Drop a comment below with your own window box tips, tricks, or epic fail stories. We’re all in this green-thumbed journey together, after all!
Now, if you’ll excuse me, I think my window boxes need some watering. Happy planting, everyone!

